In the hustle and bustle of modern life, having a freezer stocked with ready-to-eat meals can be a true game-changer. Freezing meals isn’t just about convenience-it’s an art that, when done correctly, preserves flavor, texture, and nutrition. Whether you’re a busy professional, a meal-prepping enthusiast, or simply looking to reduce food waste, knowing the right techniques can transform your kitchen routine. Dive into these practical tips to master the art of freezing meals the right way and unlock the full potential of your culinary stash.
Choosing the Best Containers for Long-Lasting Freshness

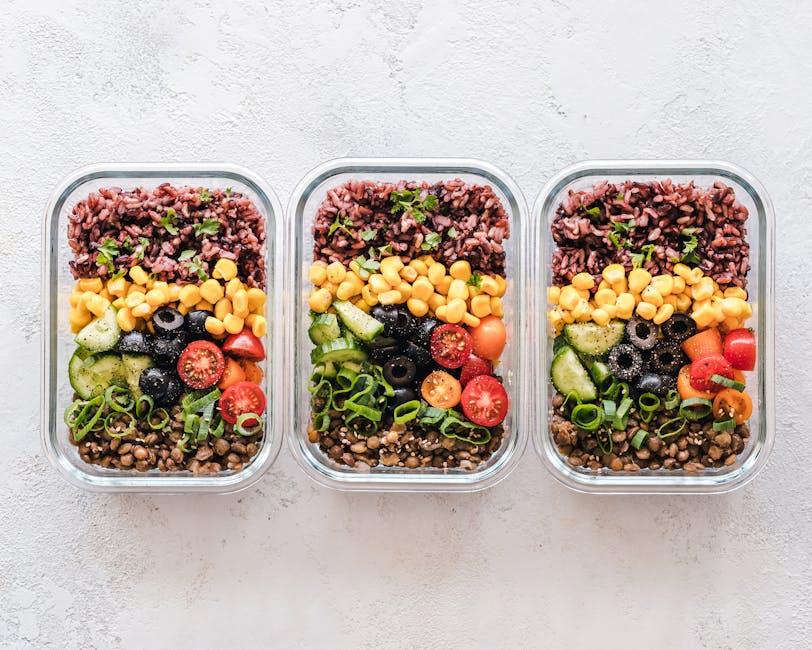
When it comes to preserving your meals for an extended period, the right storage solution is crucial. Opt for airtight containers made from high-quality materials such as BPA-free plastic, glass, or silicone, which prevent freezer burn and maintain flavor and texture. Containers with secure locking lids keep moisture and air out, effectively slowing oxidation and spoilage. Additionally, choosing stackable containers not only optimizes your freezer space but also ensures easy organization and access to your frozen meals.
Consider insulation and labeling when selecting containers to maximize freshness and convenience. Containers with thicker walls provide better insulation from temperature fluctuations, vital for maintaining a steady frozen state. For quick meal rotation, always label your containers with the meal name and freezing date. Here’s a simple guide to help you decide:
| Container Type | Best For | Pros | Cons |
|---|---|---|---|
| Glass | Soups, lasagna, casseroles | Non-toxic, reusable, microwave safe | Heavy, breaks easily |
| Plastic | Individual portions, stir-fries | Lightweight, stackable, affordable | May absorb odors, potential chemical leaching |
| Silicone | Flexible, odd shapes | Reusable, space-saving, squeezable | Can be pricier, less common |
Mastering Portion Control to Prevent Waste and Save Time

Achieving the perfect balance when preparing meals for the freezer starts with understanding your typical consumption patterns. Overestimating portions not only leads to food waste but also increases the time spent on reheating or additional meal prep. Standardizing portion sizes before freezing ensures each serving is ready to enjoy without extra effort. Use measuring cups, kitchen scales, or portion control containers to keep servings consistent. This practice not only saves freezer space but also helps maintain nutritional goals and prevents impulse eating from oversized portions.
Incorporating visual aids and tools can further streamline this process. Consider labeling containers with portion information or utilizing color-coded lids to identify serving sizes quickly. Here’s a quick reference for common frozen meal portions:
| Meal Type | Portion Size | Suggested Container |
|---|---|---|
| Soups & Stews | 1 to 1.5 cups | Freezer-safe containers |
| Entrées (Pasta, Casseroles) | 1.5 to 2 cups | Portion-sized trays |
| Side Dishes | ½ cup | Small reusable bags |
| Snacks & Treats | 1 piece or handful | Snack-sized bags |
Labeling and Organizing for Easy Meal Rotation

Properly labeling each meal with the contents and freezing date is a game-changer when managing your frozen food stash. Use waterproof markers on freezer-safe labels or masking tape for easy identification. To streamline the rotation process, include reheating instructions or ingredient highlights directly on the label. This approach prevents mystery meals and ensures you enjoy your dishes at their freshest.
Organizing meals systematically can save you time and reduce food waste. Consider storing meals by category-such as proteins, vegetables, or ready-to-eat dishes-in clearly defined sections or bins. A simple color-coding system helps you visually separate categories at a glance. Here’s a quick idea for organizing meals by freshness:
| Storage Section | Color Label | Recommended Use Time |
|---|---|---|
| Recently Frozen | Green | Within 1 Month |
| Mid-Term Storage | Yellow | 1-3 Months |
| Long-Term Storage | Red | 3-6 Months |
Thawing Techniques to Preserve Flavor and Texture

To bring your frozen meals back to life without sacrificing flavor or texture, the key lies in patience. Avoid rushing the thawing process by steering clear of microwaves or hot water, which can leave food unevenly warmed or soggy. Instead, let your meals gently defrost overnight in the refrigerator; this slow thaw ensures the food maintains its moisture and aroma. For heartier dishes like stews or casseroles, consider a two-step thaw where you first refrigerate, then warm gradually in the oven to lock in textures.
For faster thawing without compromising quality, submersion in cold water is a smart choice. Place your sealed meal in a watertight bag and immerse it in cold water, changing the water every 30 minutes to keep the temperature safe and steady. This method works wonders for proteins and delicate pastas. Below is a quick reference guide for thawing common frozen foods:
| Food Type | Recommended Thawing Time | Best Method |
|---|---|---|
| Chicken | 12-24 hours | Refrigerator |
| Vegetables | 1-2 hours | Cold water bath |
| Leftovers | 8-12 hours | Refrigerator |
| Seafood | 1-2 hours | Cold water bath |
| Soups & Stews | Overnight | Refrigerator, then slow reheat |
Closing Remarks
Freezing meals the right way is more than just a kitchen chore-it’s a skill that transforms your cooking routine and saves valuable time. With a little preparation and the right techniques, you can preserve the flavors and nutrients of your favorite dishes, making mealtime easier and more enjoyable. So next time you whip up a batch of your go-to recipes, remember these tips to freeze like a pro-and unlock the full potential of your freezer as a trusty culinary sidekick. Happy freezing!


