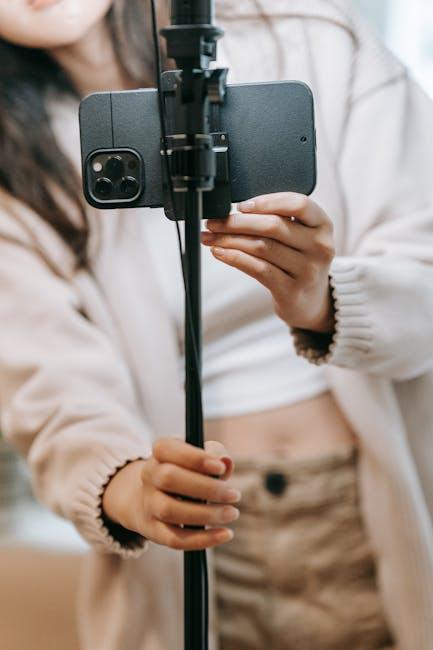
In an age where seamless connectivity defines our digital experiences, utilizing existing devices to enhance our productivity is more relevant than ever. Many of us have powerful iPhones, capable of stunning photography and video recording, yet we often overlook their potential as webcams. Imagine transforming your iPhone into a high-quality webcam for your Mac, boosting your video calls and streaming capabilities without the need for expensive equipment. In this article, we’ll explore the straightforward steps and essential tips to elevate your iPhone into a webcam, allowing you to leverage its impressive camera features for improved communication and creativity. Whether you’re attending virtual meetings or engaging with your audience online, this guide will help you harness the potential of your devices for a new level of visual clarity and professionalism.
Exploring the Benefits of Using Your iPhone as a Webcam
Using your iPhone as a webcam offers a host of benefits that can enhance your video conferencing experience, especially in today’s remote work culture. Here are some compelling reasons to make the switch:
- Superior Camera Quality: iPhones are equipped with high-resolution cameras that often surpass traditional webcams. This results in crisper images and better color accuracy, making you look more professional during video calls.
- Versatility: With apps like EpocCam or Camo, you can easily switch between your iPhone’s front and rear cameras, adding versatility to your streaming options.
- Easy Setup: Connecting your iPhone to your Mac is straightforward. Most applications require just a simple USB connection or Wi-Fi setup, allowing you to be up and running in minutes.
- Portability: Your iPhone is already a part of your daily life, making it easy to grab and go. Whether you’re traveling for work or at home, it’s a convenient option.
- Supplementary Features: iPhones offer features like image stabilization and advanced lighting adjustments that can improve picture quality without needing additional equipment.
- Cost-Effective: Instead of investing in a high-end webcam, leveraging your existing iPhone can save you money while still delivering excellent performance.
When considering using your iPhone as a webcam, keep in mind the software requirements and the ability to adjust the settings for optimal performance. Many third-party applications provide customization options that allow you to enhance your video output, depending on your needs.
Here’s a quick comparison of popular apps you can use:
| App Name | Price | Features |
|---|---|---|
| EpocCam | Free / Paid | Multiple resolutions, front and rear camera support |
| Camo | Free / Paid | High-quality video, text overlays, adjustable settings |
| iVCam | Free / Paid | Record and stream in HD, multiple camera options |
Incorporating your iPhone as a webcam can significantly enhance your video quality and overall experience, making it a smart choice for anyone working from home or connecting virtually with clients and colleagues.
Step-by-Step Guide to Setting Up Your iPhone as a Webcam
Transforming your iPhone into a webcam for your Mac is a great way to enhance your video calls and streaming quality. Follow these step-by-step instructions to get set up quickly and easily.
Before you start, ensure you have the following:
- Your iPhone (running iOS 14 or later)
- A Mac with macOS Monterey or later
- A reliable USB cable or a strong Wi-Fi connection
- The latest version of the app you intend to use (like Zoom or Skype)
Step 1: Download Webcam Software
Choose a reputable webcam app that allows you to use your iPhone as a webcam. Some popular options include:
- EpocCam – A user-friendly option for both Mac and PC.
- iVCam – Supports high-quality video and audio transmission.
- Reincubate Camo – Provides advanced features and high-resolution support.
Step 2: Install the App on Your iPhone
Go to the App Store on your iPhone and download your chosen webcam app. Follow the on-screen instructions to install.
Step 3: Install Companion Software on Your Mac
Visit the official website of the webcam software you downloaded and install the Mac version. This software enables your Mac to recognize your iPhone as a webcam.
Step 4: Connect Your iPhone to Your Mac
You can either connect your iPhone via USB or use Wi-Fi:
- If using USB:
- Connect your iPhone to your Mac using the Lightning cable.
- Your iPhone should prompt you to trust the connected device.
- If using Wi-Fi:
- Ensure both devices are connected to the same Wi-Fi network.
- Open the webcam app on both your iPhone and Mac to establish a connection.
Step 5: Set Up Your Video Conferencing App
Open your preferred video conferencing app. Go to the settings to select your new webcam source:
- In Zoom, go to Preferences -> Video and choose the camera option for your iPhone.
- In Skype, navigate to Settings -> Audio & Video and select your iPhone camera.
Step 6: Adjust Your Settings
Fine-tune your video settings based on your needs:
- Resolution: Choose HD for better quality, if supported by your app.
- Framing: Ensure your face is centered and well-lit.
Step 7: Start Streaming!
Now that everything is set up, you’re ready to start your video calls or streams with enhanced clarity and professionalism.
Enjoy the new level of video quality that using your iPhone as a webcam can bring!
Tips for Enhancing Your Video Quality and Performance
Enhancing the quality and performance of your video when using your iPhone as a webcam is essential for delivering clear and engaging content. Here are some actionable tips to achieve that:
- Stable Connection: Ensure that your iPhone is connected to a strong Wi-Fi network. A wired connection, if possible, can significantly reduce latency and improve video quality.
- Good Lighting: Position yourself in front of a natural light source or use soft, diffused lighting. Avoid harsh backlighting to prevent shadows on your face.
- Optimal Angle: Place your iPhone at eye level for a more flattering perspective. Using a stand or tripod can help achieve this stability.
- Close Background Apps: Free up your iPhone’s processing power by closing unnecessary apps running in the background. This ensures your video app runs smoothly.
- Adjust Camera Settings: Check if the app you are using allows you to adjust settings like resolution and frame rate. Higher resolutions (1080p or 4K) yield better quality.
- Test Your Audio: Use an external microphone for clearer audio. Built-in mics can be affected by ambient noise, so consider a lapel or USB mic for superior sound quality.
- Keep Your Device Charged: Ensure your iPhone is sufficiently charged or plugged in during use to avoid sudden shutdowns or performance dips.
By implementing these tips, you can significantly enhance the presentation and professionalism of your video calls, making your iPhone a powerful tool for streaming and virtual communication.
| Tip | Description |
|---|---|
| Stable Connection | Use strong Wi-Fi or a wired connection to minimize lag. |
| Good Lighting | Utilize natural or soft diffused lighting for a flattering appearance. |
| Optimal Angle | Position the camera at eye level to enhance visual appeal. |
| Close Background Apps | Maximize performance by minimizing background tasks. |
| Adjust Camera Settings | Optimize resolution and frame rate settings based on your needs. |
| Test Your Audio | Consider an external microphone for improved audio clarity. |
| Keep Your Device Charged | Avoid performance issues by ensuring battery life is sufficient. |
Troubleshooting Common Issues for a Seamless Experience
To ensure a smooth experience while transforming your iPhone into a webcam, it’s essential to troubleshoot any common issues that may arise. Here are the frequently encountered problems and effective solutions:
- Camera Not Responding: If your iPhone camera displays a black screen, try closing the camera app and reopening it. If that doesn’t work, restart your iPhone to reset the camera software.
- App Installation Issues: Ensure that you download the necessary software on your Mac to enable webcam functionality. Verify that your Mac and iPhone are compatible and that any firewall settings aren’t blocking the connection.
- Poor Video Quality: Check your lighting. Natural light works best for clarity. Also, make sure the camera lens is clean, as smudges can significantly affect the quality of your video.
- Connectivity Problems: If you are using a wired connection, ensure the cable is intact and securely plugged into both devices. For wireless connections, ensure that both devices are on the same Wi-Fi network.
- Audio/Visual Sync Issues: If there’s a lag between video and audio, try restarting both devices and ensuring that no other applications are consuming too much processing power.
### Common Troubleshooting Steps
| Issue | Solution |
|---|---|
| Camera App Crashes | Force-close the camera app and restart your iPhone. |
| Connection Drops | Check Wi-Fi strength; consider switching to a different network. |
| Application Lags | Close background apps and restart your Mac to free up resources. |
| Red/Blue Tint on Video | Adjust settings within the app or restart the camera to reset color profiles. |
By following these troubleshooting tips, you can effectively resolve common issues and enjoy a seamless transformation of your iPhone into a webcam for your Mac. Remember, it’s important to keep both devices updated with the latest software updates to minimize compatibility problems.
Wrapping Up
In today’s digital age, the ability to effortlessly connect and communicate is paramount. By transforming your iPhone into a webcam for your Mac, you’re not just enhancing your video calls; you’re unlocking a world of possibilities for remote work, virtual hangouts, and creative streaming. With the seamless integration of Apple’s Continuity Camera, the setup is intuitive and straightforward, allowing you to focus on what truly matters-your presentations, conversations, and connections. So why wait? Embrace the technology at your fingertips and elevate your video experience today. Your next virtual interaction could be your best one yet. Happy connecting!


