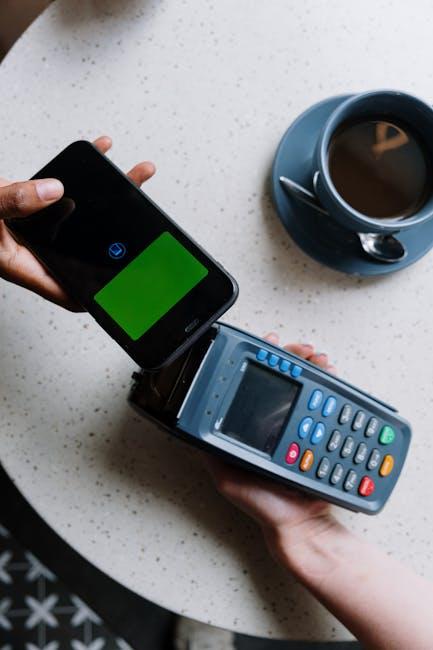
In today’s fast-paced digital world, convenience is key, especially when it comes to making purchases. Apple Pay has emerged as a frontrunner in digital payment solutions, offering users a safe and efficient way to manage transactions both online and in-store. For Mac users looking to streamline their shopping experience, setting up Apple Pay is a straightforward process that opens the door to seamless payments at your fingertips. In this article, we will guide you through the easy steps to set up Apple Pay on your Mac today, enhancing your purchasing power with just a few clicks.
Understanding Apple Pay and Its Benefits
Apple Pay is revolutionizing the way we handle transactions, offering a secure and seamless method to make purchases directly from your devices. Here’s a look at the numerous advantages of using Apple Pay, especially for users in the United States.
Security and Privacy
One of the standout features of Apple Pay is its focus on security. When you use Apple Pay, your card number is never stored on your device or shared with merchants. Instead, a unique Device Account Number is assigned, encrypted, and stored securely in the Secure Element of your device. This makes your transactions not just convenient but also safe.
Convenience
Apple Pay allows you to make payments with just a tap or glance. Whether you are shopping in-store, online, or within apps, you can complete your purchase quickly, minimizing the time spent checking out.
Wide Acceptance
Many retailers across the U.S. accept Apple Pay, including:
- Major department stores like Macy’s and Target
- Fast-food chains like McDonald’s and Subway
- Grocery stores including Whole Foods and Safeway
- Online giants such as Amazon, Uber, and Airbnb
As more businesses adopt contactless payment systems, Apple Pay’s acceptance is continuously growing.
Rewards and Loyalty Programs
When using Apple Pay, many retailers offer special promotions, cash back, or loyalty points, making it a great choice for saving money while shopping. You can effortlessly link your loyalty cards to your Apple Wallet, ensuring you always earn rewards.
Integration with Other Apple Services
Apple Pay integrates seamlessly with other Apple services. For instance, you can use Apple Cash to send money to friends or family through iMessage and use it to pay for purchases effortlessly. This approach enhances your overall Apple ecosystem experience, allowing for a unified and efficient transaction method.
Setting Limits and Control
With Apple Pay, you have the ability to manage your spending. You can easily track your transactions, and since you’re not using physical cards, it becomes easier to stick to a budget. Plus, you can send and receive money through Apple Cash, providing a convenient way to settle expenses with friends.
Accessibility
Apple Pay is designed to be user-friendly. Its interface is straightforward, making it easy for anyone to set up and use, regardless of their tech-savvy level. With just a few taps, you can start making secure purchases.
Whether you’re buying a coffee, purchasing a new pair of shoes, or making an online reservation, Apple Pay is transforming everyday transactions. By leveraging its benefits, you not only streamline your shopping experience but also enhance your financial security.

Preparing Your Mac for Apple Pay Activation
Before activating Apple Pay on your Mac, it’s essential to ensure your device is properly prepared. Follow these steps to set everything up smoothly:
- Check macOS Compatibility: Ensure your Mac is updated to the latest version of macOS. Apple Pay is supported on macOS Sierra or later.
- Set Up Your Apple ID: You need an Apple ID signed in to iCloud. If you haven’t already, create an Apple ID or log in to your existing account.
- Ensure Two-Factor Authentication: For added security, enable two-factor authentication for your Apple ID. This step is necessary for Apple Pay to function.
- Enable Bluetooth: Make sure Bluetooth is activated, as it allows your Mac to communicate with your iPhone or Apple Watch for transactions.
- Have a Compatible Credit or Debit Card: Apple Pay works with various US banks. Make sure your card is from a participating bank, like Chase, Bank of America, or Capital One.
- Create a Passcode on Your Devices: If you’re using an iPhone or Apple Watch, ensure there’s a passcode set up for added security.
- Install Required Software: If you’re using a payment processor or point-of-sale system, check for any necessary updates or installations.
Once these preparations are complete, you can begin the activation process, which will allow you to make secure and convenient payments right from your Mac.

Step-by-Step Guide to Activate Apple Pay
Activating Apple Pay on your Mac is a straightforward process that can enhance your online shopping experience with convenience and security. Follow these easy steps to get started:
- Ensure Compatibility: Make sure your Mac is compatible with Apple Pay. You’ll need a Mac with Touch ID or one that is paired with an Apple Watch or iPhone that supports Apple Pay.
- Update Your Software: Check that your macOS is updated to the latest version. Go to the Apple menu, select “System Preferences,” then click “Software Update.”
- Open Wallet Settings: Click on the Apple menu, navigate to “System Preferences,” and then select “Wallet & Apple Pay.”
- Add a Card: Click “Add Card” to start the setup. You can either scan your card using your Mac’s camera or enter your card details manually.
Follow these prompts:
- Input your card number, expiration date, and security code.
- Accept any terms and conditions set by your bank or credit provider.
If you’re using a card linked to your Apple ID on your iPhone or iPad, you might have the option to transfer it. Just follow the on-screen prompts to verify your identity and complete the activation.
Verification: Your bank may need to verify the card. Look for a verification code sent via SMS, email, or through your banking app to complete this step.
Testing Apple Pay: Once your card is added and verified, you can test it by visiting a website that accepts Apple Pay. Click on the Apple Pay option at checkout, and complete your purchase using Touch ID or your Apple Watch.
| Card Type | Issuers Supported |
|---|---|
| Credit Cards | Visa, MasterCard, American Express |
| Debit Cards | Chase, Bank of America, Wells Fargo, and more |
| Prepaid Cards | NetSpend, American Express Serve, Green Dot |

Troubleshooting Common Setup Issues
While setting up Apple Pay on your Mac, you might encounter some common issues that can hinder a smooth setup. Here’s a guide to troubleshoot these problems effectively:
1. Verify Your Device Compatibility
Before proceeding, ensure your Mac supports Apple Pay. Generally, you’ll need a Mac model from 2012 or later and macOS Sierra or later. If you’re using an older machine, it might not support the service.
2. Check Your Internet Connection
Apple Pay setup requires a reliable internet connection. If you’re experiencing issues, it’s worth troubleshooting your Wi-Fi:
- Disconnect and reconnect to the network.
- Restart your router.
- Try a different network if available.
3. Ensure Apple ID and Settings Are Correct
Your Apple ID must be set up correctly to use Apple Pay. Here’s how to verify:
- Go to
System Preferences>Apple ID. - Ensure you are signed in with your Apple ID.
- Check that iCloud is enabled for Apple Pay.
4. Add a Compatible Card
Make sure the card you’re trying to add is supported. Many American banks and credit cards work with Apple Pay, but some do not. You can check this on your bank’s website or directly in the Wallet app on your iPhone.
To add a card:
- Open
Walleton your Mac. - Click on the
Addbutton. - Follow the prompts to add your payment method.
5. Update Your OS
Outdated software can lead to various issues. Ensure your macOS is up-to-date:
- Go to
System Preferences>Software Update. - Install any available updates.
6. Restart Your Mac
A simple restart can resolve many issues. Save your work, then restart your Mac to see if Apple Pay starts functioning again.
7. Contact Customer Support
If problems persist, don’t hesitate to reach out to your bank’s customer service or Apple Support for further assistance. They can provide guidance tailored to your specific situation.
Troubleshooting Table
| Issue | Common Solution |
|---|---|
| Device not compatible | Check model and macOS version. |
| Connectivity issues | Restart router and reconnect to Wi-Fi. |
| Apple ID not set up | Verify correct Apple ID and iCloud settings. |
| Unsupported card | Check with bank for card compatibility. |
| Software is outdated | Update macOS to the latest version. |
By following these troubleshooting steps, you can easily handle common issues that may arise during the setup of Apple Pay on your Mac.

Key Takeaways
As you grasp the convenience of Apple Pay on your Mac, you’re not just simplifying your transactions; you’re also embracing a more secure way to shop online. With just a few easy steps, you can unlock the potential of seamless payments that enhance your digital lifestyle. Whether you’re making a quick purchase or indulging in a much-anticipated online shopping spree, Apple Pay transforms the checkout experience into a breeze. So, set up your Apple Pay today, and enjoy the blend of efficiency and security it brings to your every transaction. Happy shopping!


