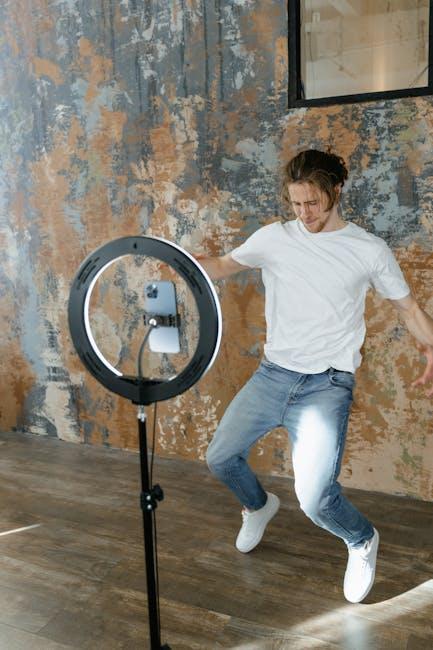
In today’s digital age, capturing moments as they unfold on your device has never been more essential. Whether you’re sharing your gaming triumphs, creating engaging tutorials, or documenting important app features, mastering screen recording on your iPhone unlocks a world of possibilities. This guide demystifies the process, providing you with easy-to-follow steps to harness the built-in screen recording feature. With just a few taps, you’ll be ready to record audio and video of your screen activity, ensuring that nothing is left to memory. Let’s embark on this journey to make your iPhone a powerful storytelling tool.
Essential Settings to Optimize Your iPhone for Screen Recording
To ensure a smooth and high-quality screen recording experience on your iPhone, you’ll want to tweak a few essential settings. Here’s how to optimize your device for screen recording:
- Enable Screen Recording: Start by adding the screen recording feature to your Control Center. Go to Settings > Control Center, then find Screen Recording and tap the green “+” icon.
- Adjust Microphone Settings: If you want to record audio along with your screen, long-press the Screen Recording button in the Control Center and turn on the microphone. This allows you to capture commentary or sound from your environment.
- Check Storage Space: Ensure you have adequate storage for your recordings. Navigate to Settings > General > iPhone Storage to see how much space you have available. Clear out unused apps or files to make room.
- Turn on Do Not Disturb: Minimize interruptions by enabling Do Not Disturb. Go to Settings > Do Not Disturb and toggle it on. This will prevent notifications from disrupting your recording.
- Optimize Performance: Close unnecessary apps running in the background. Swipe up from the bottom of the screen (or double-tap the Home button) to view open apps and swipe them up to close.
- Set Display Settings: For the best visual quality, set your display brightness to an appropriate level. Go to Settings > Display & Brightness and choose a brightness level that is comfortable yet not too high, as high brightness can sometimes wash out screen recordings.
By refining these settings, you’ll create an optimal environment for capturing high-quality screen recordings that showcase your apps, games, or presentations perfectly.

Step-by-Step Guide to Capturing High-Quality Videos
Capturing high-quality videos on your iPhone can transform your digital storytelling. Follow these steps to ensure you’re not only recording but also producing stunning footage.
1. Enable Screen Recording
- Open the Settings app.
- Scroll down and tap on Control Center.
- Find Screen Recording and tap the green plus icon to add it to your Control Center.
2. Access the Control Center
- On iPhones with Face ID, swipe down from the upper-right corner of the screen.
- On older models with a Home button, swipe up from the bottom of the screen.
3. Set Your Recording Preferences
- Press and hold the Screen Recording button in the Control Center to access additional settings.
- If you want to record audio, tap the microphone icon to toggle it on.
4. Start Recording
- Tap the Screen Recording icon. You’ll see a countdown (three seconds) before the recording begins.
- Navigate to the app or content you want to record after the countdown ends.
5. Stop Recording
- Open the Control Center again and tap the Screen Recording icon, or tap the red status bar at the top of your screen and select Stop.
6. Edit Your Video
- Open the Photos app and find your recorded video.
- Click Edit in the top right corner to trim or modify the video as necessary.
| Tip | Description |
|---|---|
| Lighting | Ensure you have good lighting to enhance video quality-natural light works best. |
| Background Noise | Choose a quiet environment to minimize distractions and ensure good audio quality. |
| Stabilization | If possible, use a tripod to keep your iPhone steady during recording. |
| Resolution Settings | Check your iPhone’s camera settings to ensure you’re recording at the highest quality available. |
By following these steps, you can create professional-quality videos right from your iPhone. Enjoy capturing and sharing your moments!

Creative Techniques to Enhance Your Screen Recording Experience
To elevate your screen recording experience on your iPhone, consider implementing some imaginative techniques and best practices. These creative approaches not only enhance the quality of your recordings but also make them more engaging and informative for your audience.
- Use Annotations and Drawing Tools: iOS allows you to draw and annotate during your screen recording. Whether you’re creating a tutorial or a walkthrough, highlight key features or tap points on the screen. To activate this, swipe up from the bottom corner of your screen, select the Markup tool, and let your creativity flow.
- Add Background Music: To create a more captivating experience, consider blending in background music. Apps like iMovie or GarageBand can help you edit your recording, allowing you to overlay music or sound effects that complement your content.
- Incorporate a Facecam: Adding a facecam overlay can personalize your recordings, making them feel more connected and engaging. Use third-party apps like OBS Studio or Streamlabs to achieve this multi-source recording effect, ensuring your audience feels involved in your commentary.
- Plan Your Content: Before hitting record, outline your content structure. This ensures a smooth flow, minimizing edits and cuts later. A well-prepared script or bullet points can help keep your thoughts organized.
- Adjust Video Quality Settings: Go to Settings > Control Center > Customize Controls, and tap the + next to Screen Recording. Check your Video Quality settings-opting for 1080p over 720p can enhance the clarity of your tutorials, especially for intricate apps.
| Technique | Description | Benefits |
|---|---|---|
| Annotations | Use Markup tools to highlight important aspects during recording. | Increases viewer engagement by drawing attention to key features. |
| Background Music | Overlay music using editing tools post-recording. | Makes videos more enjoyable and dynamic. |
| Facecam Overlay | Add a video overlay of yourself during the recording. | Puts a human touch on tutorials, creating a connection with viewers. |
| Planned Content | Outline important points or a script beforehand. | Facilitates smooth flow and minimizes distracting pauses. |
| Video Quality Setting | Increase resolution for clearer visuals. | Improves clarity, especially for detailed content. |
By employing these techniques, your screen recordings can stand out as polished, professional, and engaging, turning simple demos into memorable visual experiences.

Troubleshooting Common Issues with iPhone Screen Recording
Screen recording on your iPhone is a powerful feature, but sometimes users face issues that prevent it from working smoothly. Here are some common problems and effective troubleshooting steps to get you back on track:
Check Screen Recording Settings
- Go to Settings > Control Center > Customize Controls.
- If you don’t see Screen Recording there, tap the green plus icon to add it to your Control Center.
Verify Restrictions
- Navigate to Settings > Screen Time > Content & Privacy Restrictions.
- Check if any restrictions are enabled, which may prevent screen recording from being accessible.
Update iOS
- Often, system bugs can affect features like screen recording. Make sure your iPhone is running the latest version of iOS.
- Go to Settings > General > Software Update to check for updates.
Restart Your Device
Sometimes, a simple restart can resolve issues:
- Hold down the power button until the slider appears to turn off your device, then turn it back on.
Check Storage Space
If your device is running low on storage, it might affect the functionality of screen recording:
- Check your available storage by going to Settings > General > iPhone Storage.
- Free up space by deleting unnecessary apps, photos, or videos.
Reset All Settings
If the above steps don’t work, consider resetting your settings. This won’t delete your data but will revert settings like Wi-Fi passwords:
- Go to Settings > General > Reset > Reset All Settings.
Use AirPlay as a Workaround
If you still cannot record your screen, try using AirPlay to mirror your screen to another device:
- Swipe down from the upper right corner to access the Control Center.
- Tap on Screen Mirroring and connect to a nearby compatible device.
| Issue | Potential Solution |
|---|---|
| Screen Recording Option Missing | Add it via Control Center settings |
| Restrictions Enabled | Disable restrictions under Screen Time settings |
| Device Running Old iOS | Update to the latest iOS version |
| Low Storage Space | Free up some storage |
| Persistent Issues | Reset all settings |
By following these troubleshooting tips, you’ll be able to resolve most issues related to screen recording on your iPhone. Stay patient and systematic, and you’ll be capturing your screen with ease in no time!
Future Outlook
As we wrap up this exploration of mastering screen recording on your iPhone, it’s clear that with just a few simple steps, you can capture your screen effortlessly. Whether you’re sharing a tutorial, showcasing gameplay, or documenting a crucial moment, the power lies at your fingertips. Remember, practice makes perfect! So, gather your thoughts, adjust your settings, and let your creativity flow. Now, go ahead and record your story, one screen at a time. Happy recording!


